I'm sure many of you saw that Ignite announcement about External Identities being supported for Azure Virtual Desktop (AVD) and Windows 365 (W365). If you didn't, it's worth a read. It's pretty earth shattering. 🤩
In that announcement, they also announced that using Azure Files with Entra ID authentication is now supported!
While the scripted workaround for Azure Files support in an Entra ID ONLY environment has been great, it always had its share of quirks and security risks.
This new method is still in Private Preview (at the time of writing this),but is considerably more secure.
Because the Microsoft Documentation (see Store FSLogix profile containers on Azure Files using Microsoft Entra ID - FSLogix | Microsoft Learn, Configure SMB Storage Permissions - FSLogix | Microsoft Learn, Introduction to Microsoft Entra Kerberos - Microsoft Entra ID | Microsoft Learn, Microsoft Entra Kerberos Authentication for Azure Files | Microsoft Learn, Configure Directory and File Level Permissions for Azure Files | Microsoft Learn, etc) is a little difficult to navigate, this guide walks you through how to do this as easily as possible using Nerdio Manager.
For a video walk through and a wonderful blog post on doing this entirely in Azure, check out these resources created by Nerdio's Travis Roberts.
Prerequisites
- An Azure Tenant in the Public Cloud (Government editions aren't currently supported)
- Cloud-only users (hybrid users aren't supported with this method)
- Windows 11, version 24H2 or later with the 2025-09 Cumulative Updates for Windows 11 (KB5065789) or later installed.
- AVD host pool with Entra ID joined session hosts (Typically, you'd want to do this on a Test Host Pool first, but if you're wanting to try it in production, that would work too)
- Conditional Access MFA policies (Legacy per-user MFA and Security Defaults are NOT supported)
Create a Storage Account
If you don't already have a storage account that is joined to Entra ID, use Nerdio Manager to create a new Storage Account (see Create a new Azure Files share).
Alternatively, if the storage account isn't currently joined to an identity provider, you can use Nerdio to join it Entra ID (see Manage configured Azure Files shares).
NOTE: If you have a Storage Account that is already joined to another identity provider, you'll want to create a new storage account and Move the Profiles to a New Storage Account.
Configure Service Principal
When you join a Storage Account to Entra ID and enable Cloud Kerberos, a service principal is created.
That Service Principal needs a few tweaks to be able to operate properly.
Grant Admin Consent
- Logon to the Customer's Azure Portal
- Search for App Registrations and select the All applications tab
- Open the application (i.e. [Storage Account] <StorageAccountName>.file.core.windows.net)
-
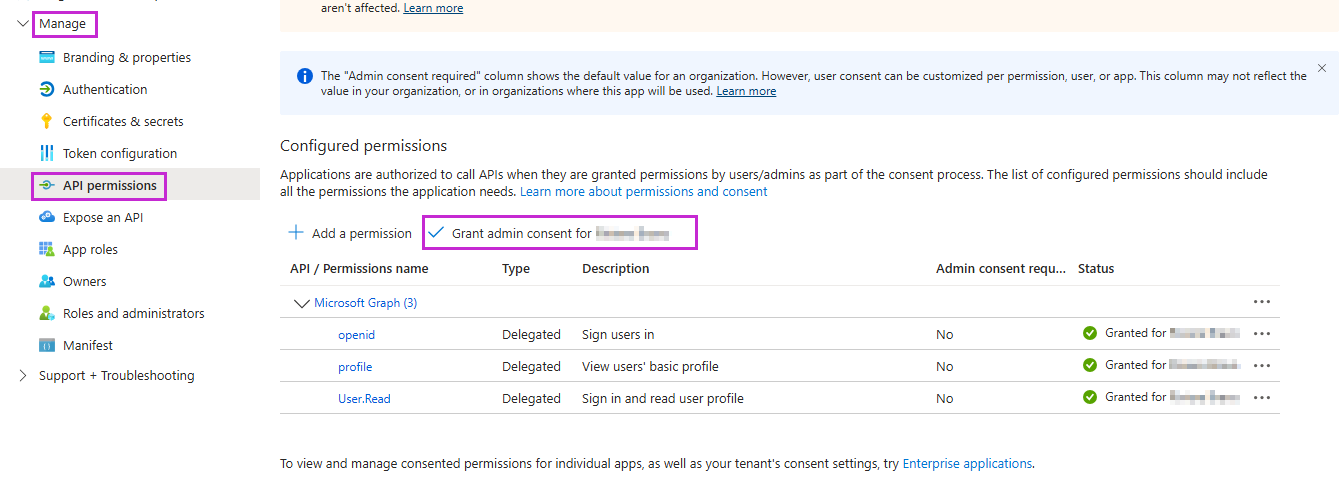
Expand the Manage blade, choose API permissions, and then click Grant admin consent
Allow Entra Cloud Groups
- Select the Manifest blade
- Add "kdc_enable_cloud_group_sids" to the tags section
-
Click Save

Exclude the App from MFA
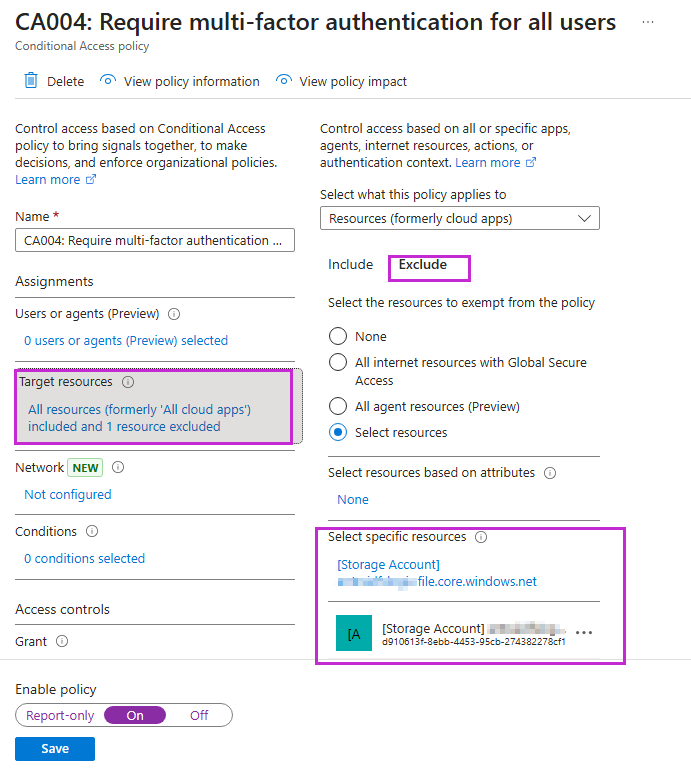
One of the big caveats of this type of authentication is that MFA requests against the App Registration for the Storage Account are not supported.
To prevent that, you'll want to make sure you're excluding the App Registration from all of your Conditional Access Policies.
Configure File-Level Permissions
With those changes in-place, you can now set the Folder/File-Level permissions for the file share.
NOTE: These instructions walk through how to do this in the Azure Portal. If you want, you can script this and do it with PowerShell instead. (see Configure Windows ACLs for cloud-only identities using PowerShell for more info)
- Sign in to the Azure portal using this specific URL: https://aka.ms/portal/fileperms
NOTE: This special URL is required, for now, but likely won't be when the feature is Generally Available. - Navigate to the file share for which you want to configure Windows ACLs.
-
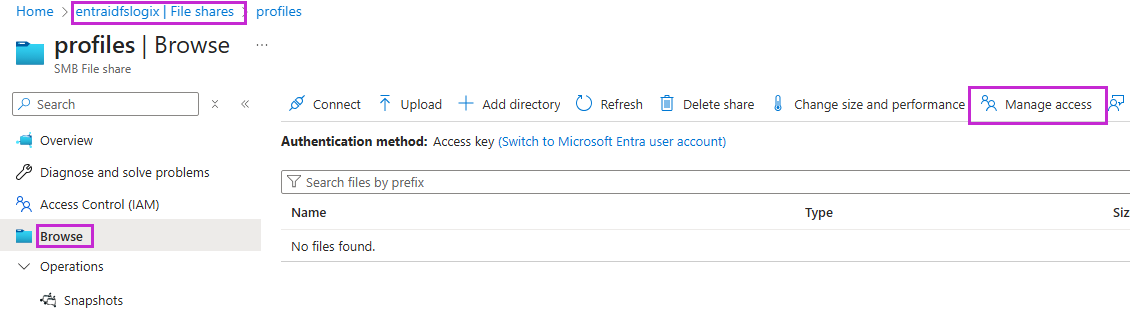
From the service menu, select Browse and choose Manage access
- Set your permissions, based on your requirements
See FSLogix SMB Storage Permissions for more info
Example:
Admin group: Full control
FSLogix user group: Modify on root folder only
CREATOR OWNER: Modify subfolders and files only
When finished, your permissions should look similar to this:
NOTE: Be sure to click Save when you're finished.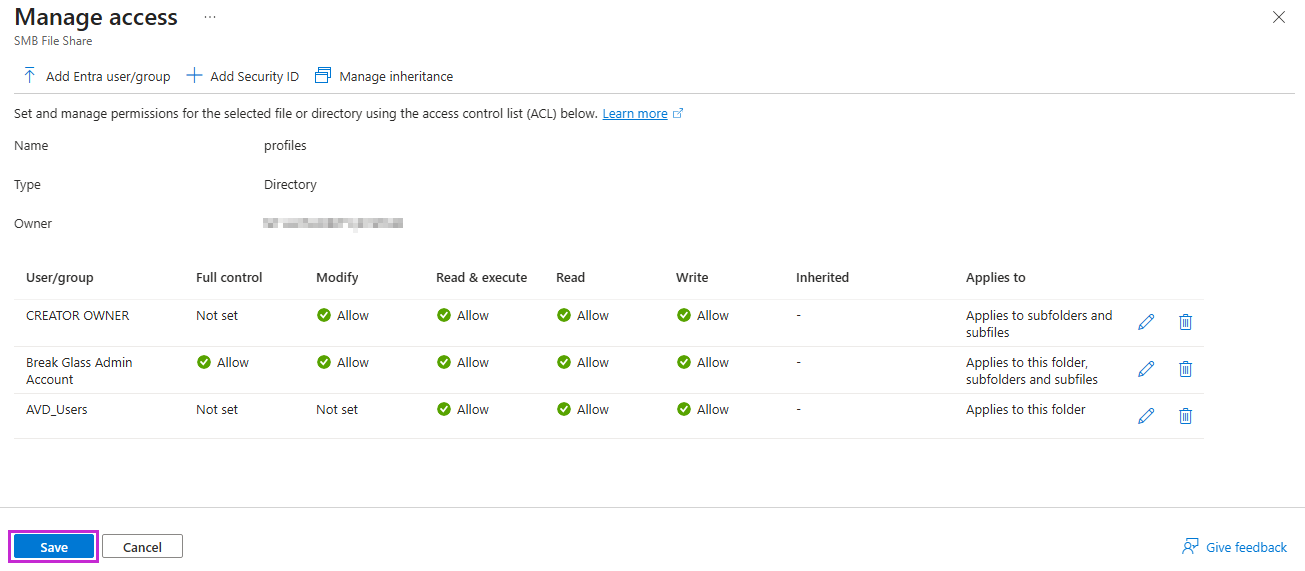
Configure the Session Host(s) to utilized Kerberos Tickets
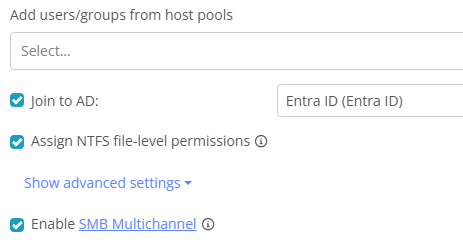
With Nerdio Manager's FSLogix Profiles, you can put the required Cloud Kerberos settings in-place for FSLogix with a simple checkbox on your FSLogix Profile settings.
(If you prefer to do it manually, you can follow the script method below)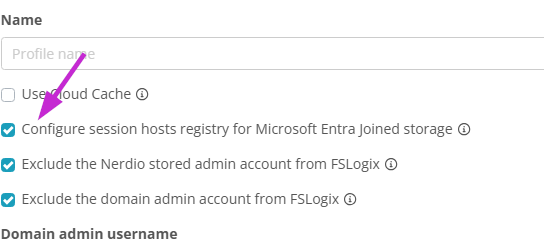
NOTE: If you're using an existing FSLogix Profile that was using the Storage Account Key work around, be sure to change the AccessNetworkAsComputer option to 0 or Not Configured.

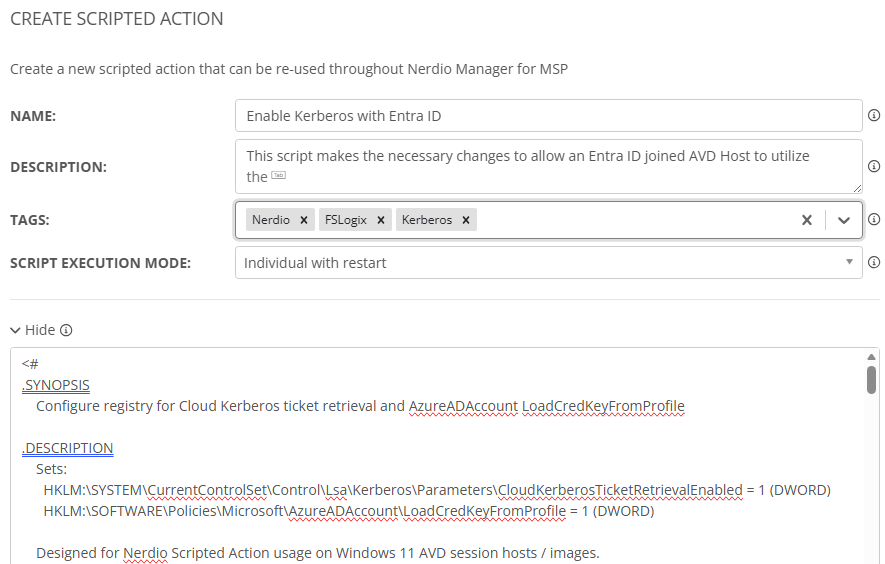
This how you can do this with a Script instead of the Nerdio Manager FSLogix profile settings:
This is the last bit of configuration you'll need to do before you can test it out.
There are two registry keys that are needed to allow an Entra ID enabled host to be able to utilize Kerberos.
- HKLM:\SYSTEM\CurrentControlSet\Control\Lsa\Kerberos\Parameters\CloudKerberosTicketRetrievalEnabled = 1 (DWORD)
- HKLM:\SOFTWARE\Policies\Microsoft\AzureADAccount\LoadCredKeyFromProfile = 1 (DWORD)
You can either run this on your Desktop Image VM and then capture a new copy of the image (see Update a desktop image and hosts) or add it as a VM Deployment task on VM Creation. The instructions below assume you're adding it to the host creation process.
-
Create a new Scripted Action with the script at this link
See Create a new Scripted Action for more info
NOTE: It is recommended to create this Scripted Action at the MSP level of Nerdio Manager and then assign it to your customer accounts so you can use the same script in all of your customer accounts.
- Go to the Host Pool Properties and choose the VM Deployment tab
- Add the Scripted Action to the Run Scripted actions when host VM is CREATED section
-
Click Save & Close

Test and Implement in Production
Logon to your test host pool with your cloud-only user test account and verify it's working correctly.
Once you have confidence that this is ready for prime-time, roll-out the same solution on your production host pools.
Comments (1 comment)