Hey everyone, Jignesh here with your Nerdio Go-Live Engineering team!
Problem
Entra-ID joined Hosts/Servers are down!
In rare cases, you may encounter an unrecoverable session host/server that still contains important locally stored data, such as QuickBooks files. While there isn’t a single, straightforward recovery method, I’ve outlined a set of practical steps that can help you quickly extract and migrate those files when this situation arises
Although you can restore the VM through Backup Center, a restored image of an Entra ID–joined session host will not be able to re‑establish trust with Microsoft Entra ID. Because the device identity and authentication material stored in Entra ID cannot be rolled back, the restored VM will fail to authenticate and AVD users will be unable to sign in.
Solution
To avoid restoring the entire VM and then troubleshooting identity failures, the recommended approach is to use the steps below to recover only the required application data (e.g., QuickBooks files) and migrate it to a new, healthy session host. This method ensures data recovery without reintroducing device‑trust issues.
This requires:
- A Desktop Image with current Apps and OS Updates.
- Newly created Session Host VM from latest Desktop Image or Azure Marketplace Image.
Check out these articles for more detailed steps:
- How do I update a desktop image and hosts?
- How To Manually Add Session Host
- https://nmmhelp.getnerdio.com/hc/en-us/articles/25498269997709-Overview-of-Servers
In the Azure Portal > Recovery Service Vaults
- Confirm a new host is created in the host pool in Nerdio.
- Go into specific Vault
- Protected Items > Backup Items > “Azure Virtual Machine”
- Find the previous Host VM you’d like to restore from.
- Click the ellipses (…) to the right of the VM.
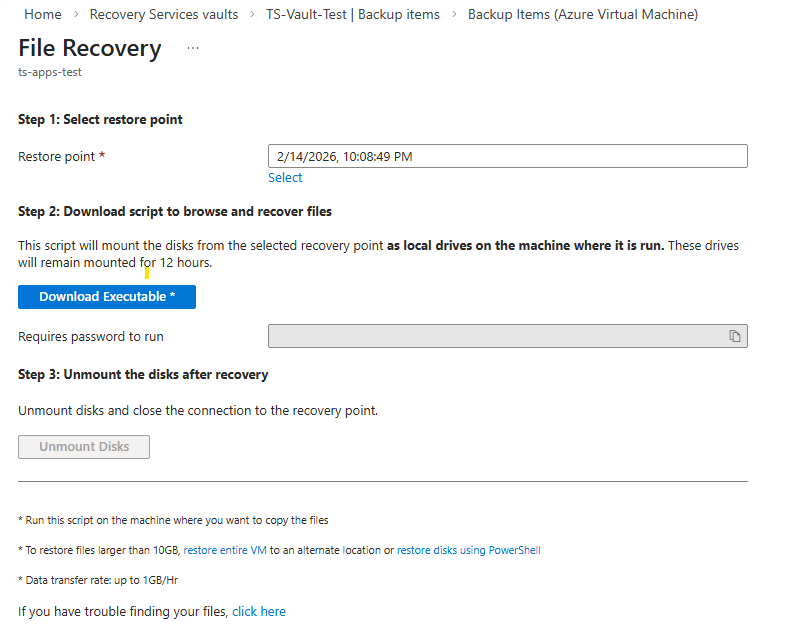
- Select File Recovery.
- Select the most recent restore point.
-

- Download the executable.
- This script will mount the disk from recovery point as a local drive on the machine where it is run.
- See this Nerdio KB for further illustration on File Level restore: File level restore as mountable disk
- Run the script on the new AVD host you created in step 1.
- Login to the new host with the admin user that has the "VM Admin Login Role" rights assigned (For more info, see this Microsoft link: Assign VM Admin Login Role
- Drill into the folders and move the specific file(s) required from the mounted recovery drive onto the new Session Host.
- Return to the Azure Portal-Backup Items sections and click "Unmount Disk" when you’re finished.
Pro-Tip
1. Be sure to cleanup Old VM and delete accordingly
2. Enable backup new AVD Host/VM once confirmed up and running
Comments (0 comments)